|
|||||||||||||
|
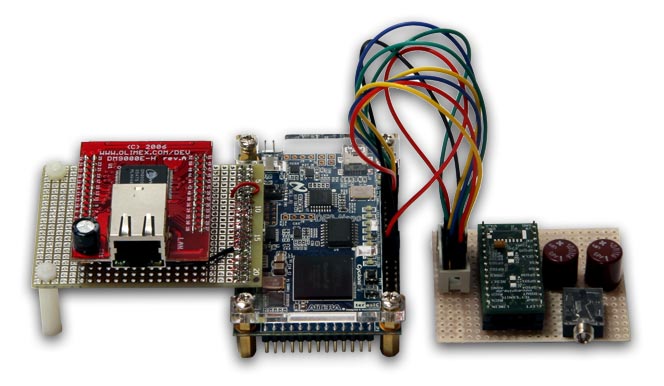
N2IRvs is an Internet Radio which is supported by the Nios II and Nut/OS. The Radio connects to SHOUTcast servers and uses a VS1053 decoder. The original project can be found at SourceForge. Here an older trunk version is used. Because of a missing nonvolatile memory on the board, this version can not store new radio stations. With this session, I will show how to import a Nut/OS package and application into your workspace. Like in the session before I do not want to write every time "Quartus II", "Nios II" or "Altera DE0-Nano Development and Education Board" in this tutorial. Therefore I will use the short form "Quartus", "Nios" and "DE0-Nano". Here the Altera DE0-Nano board, a self-made adapter and a VS1053 decoder is used:
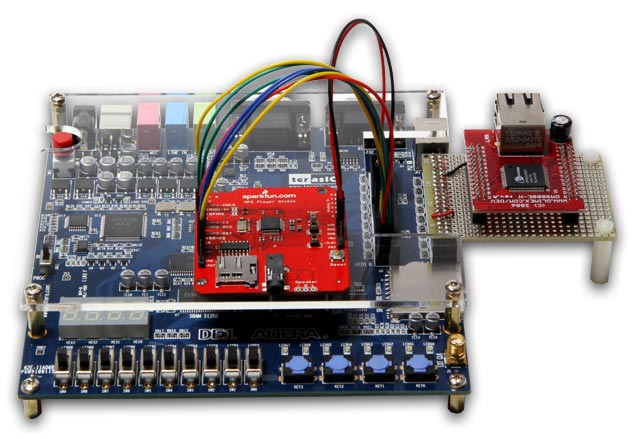
The self-made adapter is equipped with a DM9000E-H board and is used for the ethernet connection. Because of a missing RS232 interface a FTDI USB TTL Serial Cable, the TTL-232R-3V3 is used. Note: A 3V3 TTL-232 cable must be used. A 5V cable will destroy the FPGA! For more information about the connections to the DE0-Nano board, please take a look in the "de0_nano_system.qsf" file. An other possible hardware platform could be an Altera-DE1, the self-made adapter and a Sparkfun MP3 Player Shield:
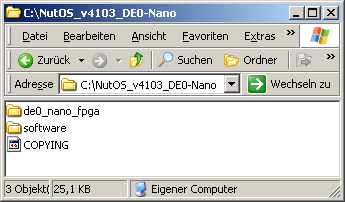
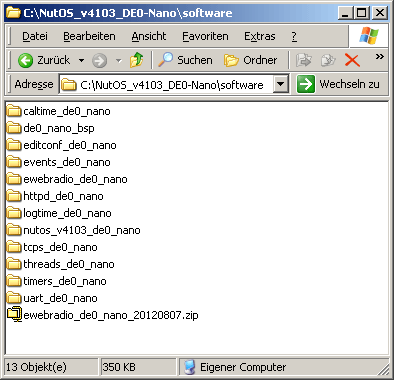
We will not start from scratch. I will provide you the Nut/OS package with the FPGA design and some Nut/OS applications. For this session download the NutOS_v4103_DE0-Nano_20120815 package and save it on your hard drive. Here I will use the root of drive "C". Extract the ZIP file, a new folder called "NutOS_v4103_DE0-Nano" will be created and the content should look like:
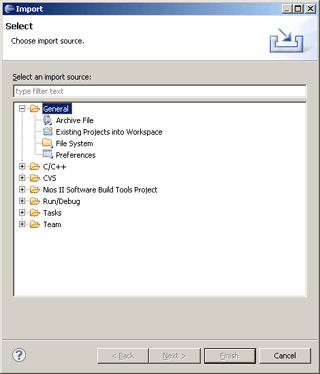
The ZIP file can be deleted. The folder "de0_nano_fpga" contains the FPGA design for the DE0-Nano. Now we will start to build the design, therefore start Quartus. Use "File > Open Project..." and navigate to "c:\NutOS_v4103_DE0-Nano\de0_nano_fpga". Open the "de0_nano_system.qpf" file. This is the Quartus project file. Next use "Tools > Qsys", navigate to "c:\NutOS_v4103_DE0-Nano\de0_nano_fpga" too. Open the "system.qsys". After a while, close the "Open System Compleded" dialog. We can now create our system, therefore change to the "Generation" tab and click the "Generate" button. Now Qsys will generate the system. This can take a moment. At the end you should see the info: "Generate Complete. 0 Errors, 8 Warnings". The warnings are internal warnings, and we can ignore these special warnings here. Click "Close" to close the dialog. Use "File > Exit" to close Qsys and return to the Quartus window. In Quartus use "Processing > Start Compilation" to compile the design. This will start the compilation process which can take a while. At the end of the process a dialog box should appear which give you the information about a successful compilation. There should be no "Critical Warning" available. The SOF file was created and we can program the FPGA. For programming the FPGA please take a look at session 2 here. Import and build the Nut/OS package Now we will import the Nut/OS package. Therefore start the Software Build Tools (SBT). Use "File > Import..." and expand the "General" option. The dialog should look like:
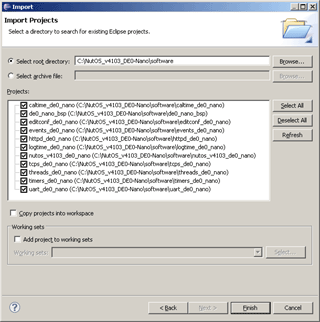
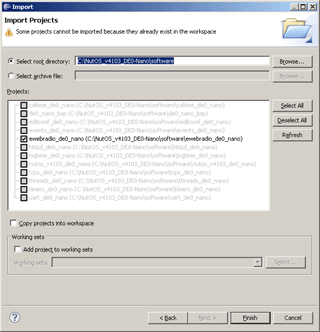
(Click inside the picture to expand) Select "Existing Projects into Workspace" and press the "Next >" button. Use the option "Select root directory:" and browse to "c:\NutOS_v4103_DE0-Nano\software". The dialog should now look like:
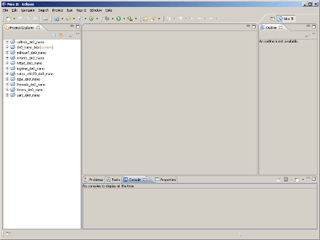
(Click inside the picture to expand) Press "Finish" and Eclipse will start to import the projects. After the import the window will look like:
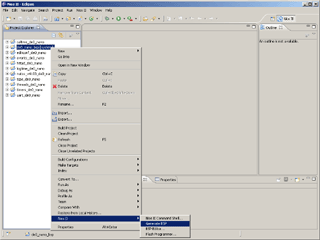
(Click inside the picture to expand) Now there should exist some more projects in the "Project Explorer". We will start with "de0_nano_bsp", the BSP for the DE0-Nano board. Right click on the "de0_nano_bsp" project and select "Nios II > Generate BSP...":
(Click inside the picture to expand) This will generate the BSP. Select the "de0_nano_bsp" in the "Project Explorer" again and use "Project > Build Project" to build the BSP. Now the Nut/OS library must be build. Select the "nutos_v4103_de0_nano" in the "Project Explorer" and use "Project > Build Project". Now the BSP and the Nut/OS library is ready to use. We can start to build the application in the next step. Building the application is like building the Nut/OS library. Here you can select one of the imported applications and use "Project > Build Project". But we want to create the Internet Radio. Therefore download the ewebradio_de0_nano ZIP file and save it under: "C:\NutOS_v4103_DE0-Nano\software" Extract the ZIP file, a new folder called "ewebradio_de0_nano" will be created and the content should look like:
The ZIP file can be delete. Now the ewebradio project must be imported. Use "File > Import..." and expand the "General" option. Select "Existing Projects into Workspace" and press the "Next > " button. Use the option "Select root directory" and browse to "c:\NutOS_v4103_DE0-Nano\software". The dialog should now look like:
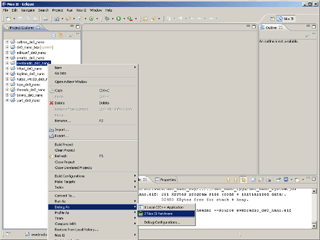
(Click inside the picture to expand) Press "Finish" and Eclipse will start to import the projects. The "ewebradio_de0_nano" project is now available in the "Project Explorer". Select it and use "Project > Build project". To start the debugger, right click on the "ewebradio_de0_nano" project and use "Debug As > Nios II Hardware":
(Click inside the picture to expand) Before you "Resume" the application, make sure that the ethernet cable is connected and your DHCP server is running. If the terminal is connected, you will see some debug messages. Press "Resume" or "F8" in the debugger to start the Internet Radio. The terminal output should look like:
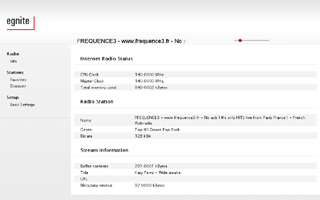
Open your browser and use "http://192.168.1.200" for the address. "192.168.1.200" is my address here, it is possible that you got an other address from your DHCP server. The result should look like:
(Click inside the picture to expand) Congratulation, the Internet Radio which is supported by the Nios II, Nut/OS and the VS1053 is running. You should hear the music in the connected earphone.
|
||||||||||||